scad x harbor picture company
- a

- Jan 7, 2025
- 31 min read
Updated: Mar 25, 2025
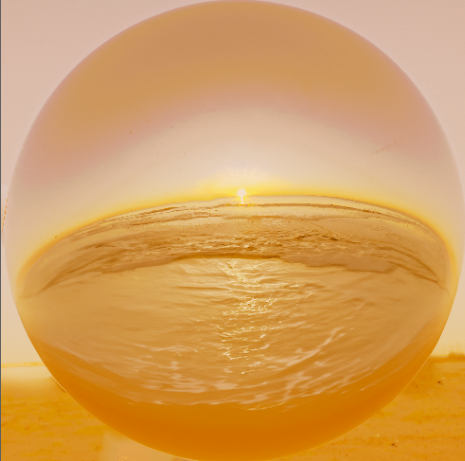
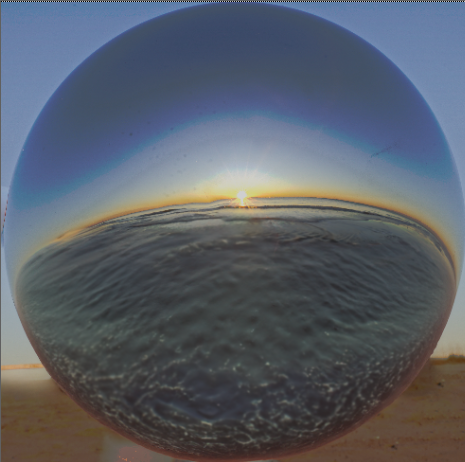
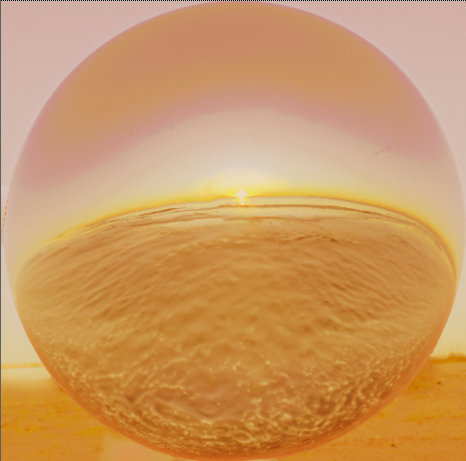
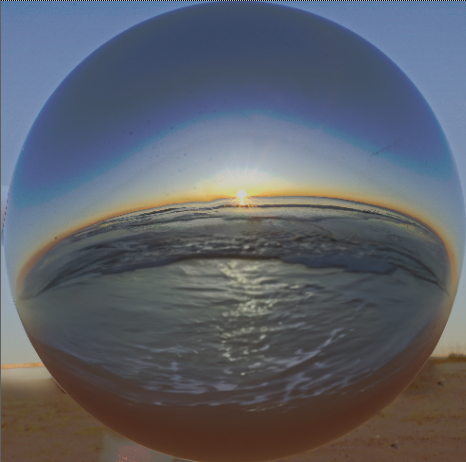
Final Result
Team Breakdown
Individual (My) Breakdown
This blog post is about the progress, development, and results of a Collaboration Project between SCAD students and The Harbor Picture Company's mentors (https://harborpicturecompany.com/). Students were divided up into groups, and given a prompt of any luxury product with the option of doing a full CG project, or a project with CG and live action integration. Our team has decided on Chanel No. 5 Perfume, leaning more on CG with a live plate background. Our roles are as below: FX Crew: Eva Chan (https://evachannc.com/scad-harbor-picture) Wei Lou (https://www.weivfx.com/blog)
Lighting/Look Development Crew: Shannon Taylor - 3D/Lighting (https://shannongtaylor03.wixsite.com/shannon-taylor-tech/blog)
Jenson Dantes - Lighting/Look Dev (https://jdantescol.wixsite.com/dantesportfolio/sanm560harbor)
Alice Yeh - Compositing/Editing (You are currently on my blog!)

Team Members
This blog post will be updated with sections below. It will follow chronologically, with the most recent updates being at the top, and each update being divided by a line with dates.
Quick Links to Other Weeks:
3/10/25 Final Week (Week 10)
For our last week, we refined our work to get our final result - this meant not a lot of huge changes, but mostly making small tweaks to get us to 100%. We did have the mentors visit us last Tuesday, so I made adjustments according to their feedback and recommendations. I will go Shot by Shot, but just updating what was changed as nothing was super drastic!
We also changed the color of the perfume liquid to be more light. Kyle had also recommended the plate be a lot brighter, so the background was brightened a lot more.
Here is the final video, my breakdown, and this week's continuity quilt:

Shot 1
Following Kyle's feedback, I roto'd areas of the flower to brighten / darken the petals. He also recommended that I remove the vignette for this Shot, which I then did.


I also created a mask to split the color correction of the water droplets in half, as one half was too bright, but it was correct for the other half.

Shot 2
I emphasized the caustics and occlusion for the water droplet as recommended by Hailey!


Shot 3
I created a blur mask to really blur the side of the perfume bottle as recommended by Kyle:


Shot 4
I created a blur mask for this shot as well to continue blurring the other sides of the bottle as recommended by Kyle.


Shot 5
We had issues with some artifacting / weird chunks showing up at the beginning of the shot, but the render that had no artifacting had a darker bottle cap (that really showed up towards the end of the shot). So what I did was export out a version of the bottle that had no artifacting with the correct cap, and keyframed it to be visible for the first 50 frames, but faded it out to 0 visibility by frame 50. When it faded it out, it was actually revealing another bottle render that had the correct cap shader towards the end of the shot! It allowed for a seamless transition.


Motion blur was also added to the bottle movement!
3/2/25 90-95% (Week 9)
As we wrap up the project, the team is working hard to refine every aspect of every shot. This week we finally got the Sheen layer to work so I could have more control over creating a highlight on the flowers instead of making a majority of a flower overexposed. I did have to redo my Nuke scripts to account for this new layer, and adjust all aspects of coloring. I also tried to follow Billy's feedback about upping the contrast and saturation of each shot. I also refined a lot of other aspects such as ZDefocus / creating a better shallow depth of field for each shot, as well as brightening up the back plate even more.
This second to last week of the project is really our last chance to make the overall ad more refined and cohesive, so I really pushed to get these shots done. I will show breakdowns for each shot next week but for now I will go Shot by Shot once more.
Here is the new weekly video with new sound:
Here is the new continuity quilt:

Quick Links:
Shot 2:
Here are the exrs that were given:
Week 9 Shot 2 EXR Renders
Here is the comp
Week 9 Shot 2 Comp
Here is my Nuke Script:


Week 9 Shot 2 Current Nuke Script

EXR AOVs
For Shot 2, I redid my Nuke script to incorporate the new Sheen layers. I used the Sheen layers as a highlight, as previously trying to make a whitest point kept overexposing a large chunk of the petals. With the Sheen layer, it let me have more control with having more variation in values and colors.
I used the new caustics and shadow matte layer to comp in the caustics:

Shadow Matte

Caustics Render

Caustics merged into shadow matte
Some other changes I did were just tweaking the color of the water droplets, and do small roto masks to change the color of certain areas that were not cooperating with the rest of the color correction (a singular water droplet and the center of the flower) I did still use an occlusion render to help control the area around the center of the flower.


Shot 3:
Here are the exrs that were given:
Week 9 Shot 3 EXR Renders
Here is the comp:
Week 9 Shot 3 Comp
Here is my Nuke Script:

Week 9 Shot 3 Current Nuke Script

EXR AOVs
Shot 3 didn't have much tweaks besides using the new Sheen layers to help with the coloring, and fixing the ZDefocus. I also roto'd the water droplet for when it leaves the flower, and color corrected / graded that since it kept being too dark.


I also incorporated the water droplet caustics using a shadow matte layer that was rendered out.

Shadow Matte

Caustics Render

Caustics merged In to Shadow Matte
Shot 4:
Here are the exrs that were given:
Week 9 Shot 4 EXR Renders
Here is the comp:
Week 9 Shot 4 Comp
Here is my Nuke Script:


Week 9 Shot 4 Current Nuke Script


EXR AOVs
For Shot 4, I did some color correction fixes for this shot, and I added a slight occlusion layer under the droplet.

Occlusion Layer
Shot 4.5:
Here are the exrs that were given:
Week 9 Shot 4.5 EXR Renders
Here is the comp
Week 9 Shot 4.5 Comp
Here is my Nuke Script:


Week 9 Shot 4.5 Current Nuke Script


EXR AOVs
For Shot 4.5, I received the flowers as separate layers (foreground and background, yay!), so it was easier to adjust the ZDefocus on them and the bottle separately. The flowers also had Sheen so I had more control over them, but it was suggested through feedback to continue the shallow depth of field, so they were blurred out anyways.
The water droplet wasn't able to render separately for this shot, so I had to use a color mask to separate it myself, which allowed me to put the occlusion layer under it. I also tweaked the ZDefocus within this shot, and added motion blur to the water droplet.

Color Mask

Water Droplet separated from bottle render using color mask

Occlusion Layer
Shot 5:
Here are the exrs that were given:
Week 9 Shot 5 EXR Renders
Here is the comp:
Week 9 Shot 5 Comp
Here is my Nuke Script:


Week 9 Shot 5 Current Nuke Script


EXR AOVs
For Shot 5, I received the flowers as separate layers (background, middle ground, and foreground separation). It made creating a more shallow depth of field achievable and also allowed to make the flowers have a light gradient (foreground flowers being darker, and background flowers are brighter). Using the reflection/color mask that was given to me in previous weeks, I could color correct the water to match the flowers and branch above.

Besides adjusting the Zdepth blurs, I made the bottle and label brighter. I also color corrected the flowers to match the previous shots.
2/23/25 80% (Week 8)
This week we had to cut Shot 1 as it was not as developed as we had hoped. We also now have all the correct light AOV layers for all the shots! We are also still following the method of lighting pre render, but recoloring in Nuke. I will now show the new updates for all the shots.
Here is the new weekly video with our new sound iteration (since we cut shot 1, I did relabel all the shots but for the sake of continuity in my blog, I will refer to the shots as the numbers they were before:
Here is this week's continuity quilt, I am still working on the coloring to get it consistent through all the shots:

Quick Links:
Shot 2: *Will fix double edge from ZDefocus, Beginning is time stretched but will have more frames for the fade in next week
Here are the exrs that were given:
Week 8 Shot 2 EXR Renders
Here is the comp:
Week 8 Shot 2 Comp
Here is my Nuke Script:

Week 8 Shot 2 Current Nuke Script

EXR AOVs
I am still working on recoloring for all the shots, but for this one I focused on using the occlusion layer that was given to me to get rid of the pitch black center in the original renders. I made it warmer and then keyframed it so that as the flower opened up more, the brighter it would get.

Occlusion Layer

Occlusion Layer with Grade/Color Correct
The ZDefocus is still being worked on, as I kept getting the double edge on some of the petals. I also got some feedback about how some of the droplets should be blurred more, but for some reason the ZDefocus wasn't catching all the droplets, so I just made a mask and blurred out the droplets.

Blur Mask
The black reflections in the droplets have also been fixed - the issue was that the droplets were intersecting with the petals and being brought into Maya as one .abc file, so there was originally no way to fix it. After bringing them as separate .abc files and giving some space between the droplets and the petals, the black areas in the water droplets were gone!
Shot 3:
Here are the exrs that were given:
Week 8 Shot 3 EXR Renders
Here is the comp:
Week 8 Shot 3 Comp
Here is my Nuke Script:

Week 8 Shot 3 Current Nuke Script

EXR AOVs
I have also begun using the albedo layer to help adjust the cell and vein pattern of the flower shader:

Albedo layer
Shot 4: *Jenson is still working on the roughness of the bottle cap shader
Here are the exrs that were given:
Week 8 Shot 4 EXR Renders
Here is the comp:
Week 8 Shot 4 Comp
Here is my Nuke Script:

Week 8 Shot 4 Current Nuke Script

EXR AOVs
I also received feedback to get rid of the orange in the bottom left of the plate, and add some fake sun rays behind the bottle, which I used the same method of faking light rays in Shot 5:

Faked light rays
Other feedback I received was to have the short depth of field consistently through the whole shot, so I get rid of the keyframing for the ZDefocus so that it was a shallow depth of field throughout instead of having the whole bottle in focus at the beginning of the shot.
Shot 4.5:
Here are the exrs that were given:
Week 8 Shot 4.5 EXR Renders
Here is the comp:
Week 8 Shot 4.5 Comp
Here is my Nuke Script (broken into two pictures):


Week 8 Shot 4.5 Current Nuke Script

EXR AOVs
I also added in the fake light rays behind the bottle just to be consistent with the shots. I also was adjusting the ZDefocus for this shot, but was having issues. There is a spot in the front where the petal is in front of the bottle, and it won't blur, but the rest of the petal is blurred. Here is a comp with that issue:
Comp with sharp petal edge issue
I tried to fix this by adjusting the ZDefocus, but I couldn't get rid of it. I ended up having to roto the area, and create a mask just to blur that spot:

Roto Mask to blur area
Shot 5: *Will fix glowing edge
Here are the exrs that were given:
Week 8 Shot 5 EXR Renders
Here is the comp:
Week 8 Shot 5 Comp
Here is my Nuke Scrip

Week 8 Shot 5 Current Nuke Script


EXR AOVs
I was given a reflection mask once again. I did some slight color correcting with this one to match the flowers to the other shots, and worked on color correcting the bottle (color of the glass, and gold banding, and brightness of the label) but I know it is not perfect.
I also had this issue with a glowing edge around the flowers which I realized came from the copy alpha node when I was trying to bring the alpha channel back to the flowers AFTER the ZDefocus.

Copy Alpha Node turned on, causing glowing edge on flowers

Copy Alpha Node turned off, no edge

Close up to see edges
As you can see, with the copy alpha node turned off, it keeps the water's alpha, which blacks out and covers the water that I did separately to color correct. If I were to have the water merged AFTER the flowers, it would cut off some of the flowers that hover over the water. (I have tested this already).
I am trying to use the alpha of the only flowers that I had to manually separate from the water, but as you can see, when I copy that alpha it creates a glowing edge. So even though I know where the issue lies, I have yet to find a solution for it. I ran out of time this week to try and fix it since I had to hand off the material to sound, but I am hoping to have this issue resolved this week.
2/16/25 New Method with New Renders (Week 7)
This week we decided to change how we did our renders. We had to switch back to our original HDR as we found out the edited and color corrected version was clamping our light values, so that it didn't help with lighting our scenes. We decided to pull all the color from the lighting so that the renders would be prominently black and white, and that meant I would have to recolor the entire render. However, we got better directional lighting doing so. I had to rework my Nuke Scripts, as the mentors suggested to NOT relight within Nuke, and because I had to recolor all the renders differently. I will show my updated Scripts, as well as the before and after all the comps, like I did the previous weeks.
Shannon has also been developing the flower shader, so we have the new one in for this week, and we also have our first sound iterations from our composer and SFX artist for the video, so make sure to watch with your sound on!
Here is the video I put together for the week of all the comps and with the new sound:
Here is the new continuity quilt of the week:

Quick Links:
Shot 1: *Flowers will be animated, layout is still WIP
Here are the exrs that were given:
Week 7 Shot 1 Raw EXR Renders
Here is the comp:
Week 7 Shot 1 Comp
Here is my Nuke Script:

Week 7 Shot 1 Current Nuke Script

EXR AOVs
With the missing light AOV layers, it was a bit harder to color correct everything the way I wanted, so right now the color correction is a WIP. We are also hoping to create a better layout and animate the flowers. The ZDefocus is working this time though!
Shot 2: *Will fix the black reflections and center
Here are the exrs that were given:
Week 7 Shot 2 Raw EXR Renders
Here is the comp:
Week 7 Shot 2 Comp
Here is my Nuke Script:

Week 7 Shot 2 Current Nuke Script

EXR AOVs
For Shot 2, it was a lot of working with the AOV layers I was given. I didn't need to use every one, that's why some are disconnected. The Zdepth was also working correctly this time, so it is looking a lot more like a correct macro shot.
However, the original renders had spots of blue, the center of the flower was too dark, and the water droplets kept catching black reflections that I had a hard time to get rid of. I will work on it more this following week, but I am hoping the new renders will have a lot of these problems solved.
Shot 3:
Here are the exrs that were given:
Week 7 Shot 3 Raw EXR Renders
Here is the comp
Week 7 Shot 3 Comp
Here is my Nuke Script:

Week 7 Shot 3 Current Nuke Script

EXR AOVs
For Shot 3, I did use a little of my old script but not to relight, but more so to recolor the different areas of the flower such as the top and bottom of the petal. Without it , it did look a little flat with a simple color correction. This is only because I was missing a LOT of the light AOV layers.
I also need to work on coloring the actual water, as it looks dark when it leaves the flower petal. Zdepth is also working correctly now for this shot.
Shot 4:
Here are the exrs that were given:
Week 7 Shot 4 Raw EXR Renders
Here is the comp:
Week 7 Shot 4 Comp
Here is my Nuke Script:

Week 7 Shot 4 Current Nuke Script

EXR AOVs
For Shot 4, I only did a slight color correction for the glass, since the original render has the glass blue. I thought changing it to a slightly pink/yellow color would match the live plate better. The rest of the script is about the same!
Shot 4.5:
Here are the exrs that were given:
Week 7 Shot 4.5 Raw EXR Renders
Here is the comp:
Week 7 Shot 4.5 Comp
Here is my Nuke Script:

Week 7 Shot 4.5 Current Nuke Script

EXR AOVs
For Shot 4.5, it was a lot more of using the new AOV light layers to light the flowers. I am also hoping next week to push albedo and have the cells in the flower shader be more prominent. Also for this weeks render, the flowers and bottle were rendered together.
I also used a cryptomatte mask to separate the flowers from the bottle, since it was a single render this time, I did this to adjust the AOVs for each asset, then remerged it at the end since they needed their own separate adjustments as the flowers needed to be recolored and the flowers didn't.
Shot 5:
Here are the exrs that were given:
Week 7 Shot 5 Raw EXR Renders
Here is the comp:
Week 7 Shot 5 Comp
Here is my Nuke Script:

Week 7 Shot 5 Current Nuke Script


EXR AOVs
I was also given a reflection mask to work with:

Reflection Mask EXR Render
For Shot 5, I had a lot more to work with. Once again, using the different light AOV layers to recolor the flowers and water separately. I also used the reflection mask that was given to me to help recolor the water without messing up the reflections in the center.
For the flowers - I had to use the cryptomattes to rebuilt the alpha for the flowers. It was a lot of alpha rebuilding after shuffling out the layers. Having a lot more light layers allowed me to bring more variations of color into the final image.

Close up of Nuke Script and Alpha Fix
Other fixes include getting rid of the black bars that appear at the top of the perfume bottle reflection in the original renders, and pushing the light rays more.
2/10/25 60% (Week 6)
This week we had issues with having no strong directional lighting in the renders, and some trouble with depth passes. We also have a new shot (4.5). I had to relight the flowers for Shots 3-5 within Nuke as the flowers were flat looking, and there was trouble reading any AOV information off of the flower shaders. I will go Shot by Shot to show what I have done this week in terms of comp!
Thankfully the perfume shader is the correct color this week, so I did not have to color correct them again.
Here is the video I put together for the week of all the comps:
Here is the continuity quilt of all the shots from my color correction:

Quick Links:
Shot 1: ***Not much progress in terms of scene layout, and I received this render late and last:
Here are the exrs that were given:
Week 6 Shot 1 Raw EXR Renders
Here is the comp:
Week 6 Shot 1 Comp
Here is my Nuke Script:

Week 6 Shot 1 Current Nuke Script

EXR AOVs
I did receive this render last and late, so I did not have a lot of time to work on this. There also was missing information from the flower shaders in the ZOV layers, as they are only showing subsurface qualities, but when plusing them together, it is clear that I am missing some information from them. The flower shaders on these also do not look like the recent ones. Next week I am hoping to adjust depth of field with Z-depth, and hopefully we will have a better render. This week I just focused on color correction and brightening the scene to match the live plate. I treated Shot 1 more as a slap comp. I also changed the color of the vignette on all the shots to purple instead of black.
Shot 2: *Had issues reading depth
Here are the exrs I was given:
Week 6 Shot 2 EXR Renders
Here is the comp:
Week 6 Shot 2 Comp
Here is my Nuke Script:

Week 6 Shot 2 Current Nuke Script

EXR AOVs
As you can see within the AOVs, I was not given a depth pass so I had to find another way around to imitate the look of a macro shot with small field of depth.
I first used the P Layer and shuffled it out, then graded it:


Then i used the red channel to copy to depth, to create an in place depth pass for now:

I then applied the ZDefocus to the exrs. As you can see in the comp above, it is not perfect, but it will have to do for this week. Hopefully next week we can get a depth pass to have a correct macro shot. There was also heavy color correction for this shot.
Shot 3: *** Also no directional lighting or correct depth pass
Here are the exrs I was given:
Week 6 Shot 3 EXR Renders
Here is the comp:
Week 6 Shot 3 Comp
Here is my Nuke Script:

Week 6 Shot 3 Current Nuke Script
Here are the AOVs for the renders:

With depth not appearing correctly, I just created a quick ellipse roto mask, inverted it, and applied a blur with very heavy feathering (about 600). This is just for now, I am hoping to get a better depth pass next week.
To "relight the scene", I shuffled out N (Y and Z) and plugged the green channel into alpha for one of the shuffles. This was used as a mask to color correct and create a sense of top lighting.


Then I shuffled out P (using P.Y to plug into all channels), and heavily adjusted whitepoint and blackpoint to create a light gradient to use as a mask, creating more diffuse lighting through the petals:


I then did some heavy color correction to acheive the final look in the comp above - I was matching the color of the flowers in Shots 4-5, as I had done those first. I also brightened the water droplet just a bit.
Shot 4:
Here are the exrs I was given:
Week 6 EXR Renders
Here is the comp:
Week 6 Shot 4 Comp
Here is my Nuke Script:

Week 6 Shot 4 Current Nuke Script
This week the I did not have to color correct the perfume again, so I focused on adjusting Z-depth and applying ZDefocus to it. We did run into this issue that if the exr is not in the color space of scene_linear, that the depth may have issues.

Z-Depth if NOT in scene_linear color space

Z-Depth working correctly in scene_linear color space
Besides getting depth to work correctly, I also did small over all color correction to the bottle. I also added an edgeblur and key framed it, because I was getting a harsh black edge from when the ZDefocus appears.
Shot 4.5:
Here are the exrs I was given:
Week 6 Shot 4.5 EXR Renders
Here is the comp:
Week 6 Shot 4.5 Comp
Here is my Nuke Script:

Week 6 Shot 4.5 Current Nuke Script
Here are the AOVs, as you can see, not a lot of information coming from the flowers but depth is reading fine for both:

Perfume AOVs

Flower AOVs
This shot was a bit trickier, as I had to relight the flowers in this scene as well, but also have the perfume bottle sandwiched in the middle of the flowers. I first relit the flowers. I shuffled out the P green channel, graded it, then reshuffled it to an alpha channel and used it as a mask to color correct the flowers to give an illusion of directional light.

Close up of Nuke Script for flower relighting and masking for foreground


I then inverted it that grade and reshuffled it to alpha to give some shadow to he foreground flower.


To have the perfume be in between the flowers , I graded the depth to these settings then shuffled out the depth to alpha, and merged it as a stencil:


I of course applied ZDefocus to the background flowers, and will work on depth of field for the foreground flowers this upcoming week. Besides doing color correction on the flowers and slightly on the bottle, I added a lightwrap and the purple vignette like I did with other shots.
Shot 5:
Here are the exrs that I was given:
Week 6 Shot 5 EXR Renders
Here is the comp:
Week 6 Shot 5 Comp
Here is my Nuke Script:

Week 6 Shot 5 Current Nuke Script
AOVs:

Perfume AOVs

Water AOVs

Flower AOVs
Depth was not an issue here, I just had to apply a ZDefocus to the water and the flowers separately. However, I did have to relight the scene for the flowers, as you could see there was almost no information for the flowers in the AOV layers.
I shuffled out the P green channel and used it to create masks for color correction, essentially faking directional light and creating the idea of shadow on the flowers.


I then inverted that shuffle and adjusted the grade to be more defined, and used it as a mask to create shadow on the flowers.

Inverting and grading the previous shuffle

I also flipped the live plate once more to have it appear in the water. I also did a lot of color correction to have the flowers match the back plate.. The other adjustment I made was changing the color of the light rays, since I received feedback that they were too yellow. I also keyframed more movements in the light ray since there were more frames to work with this week. Here is the new change on the fake light rays.

New Fake Light Rays
I also reconnected with the Sound Team this week and sent them thew video. They are working on getting us a first iteration of sound for this week, so stay tuned for that!
2/2/25 Comp Day with AOVs!!! (Week 5) Today I finally got my hands on some full renders with AOVs to work with, super exciting!! I will go Shot by Shot in order to show what I have done, but as a disclaimer I worked on Shot 5 first because it was our hero shot, so the vignette tutorial is under Shot 5's breakdown of this update. I then worked on Shot 4, as we were having issues rendering Shots 1-3, so I didn't have those yet. I recommend viewing my Shot 5 breakdown since it has the most work done, and it was what I worked on first!!!
Quick Links (clickable!):
***Another note - I was informed that the perfume shader was the wrong color so I had to do a last minute color correction for shots 4 and 5, the final results are in their respective sections in this update.
Here is the reference of the perfume liquid we are now following:

Shot 1:
***Had issues with getting Shot 1 delivered to me this week, will show comp next week
Shot 2:
Here is the mp4 that was given (***Had issues with receiving exrs so I had to use an mp4 clip that was sent instead, black background was embedded in):
MP4 Clip that was given
Here is the final comp:
Week 5 Shot 2 Comp
Here is my Nuke Script:

Week 5 Shot 2 Nuke Script
Because the black background was embedded in the video, I had to use a luminance key to pull the black background, however since the flower had some back in the center, it was hard not to pull the black from the flower as well.

Using luminance key to pull the black background
This resulted in a hard black line around the flower, so as a quick fix I just used an edgeblur to cover it up. I did some adjustments like adding a glow and vignette, but I was not given AOVs for this shot since it was an mp4 clip so I treated it more as a slap comp, and I was also given this render/clip at 1 AM.
Shot 3:
Here is the mp4 of just the exrs that were given:
Week 5 Shot 3 Raw EXR Renders
Here is the final comp:
Week 5 Shot 3 Comp
Here is my Nuke Script:

Week 5 Shot 3 Nuke Script
I also treated Shot 3 as a slap comp, since this was given to me at 1 AM with no AOVs. I simply added a subtle light wrap and vignette, and I did slight color correction and grading, just doing small things until I get AOVs for this shot.
Shot 4:
Here is the mp4 of just the exrs that were given:
Week 5 Shot 4 Raw EXR Renders
Here is the final comp:
***I was told that the perfume shader color was incorrect so I had to color correct last second:
Perfume Reference:
Week 5 Shot 4 Comp COLOR CORRECTED
Original Week 5 Shot 4 Comp
Here is the Updated Nuke Script:

Week 5 Shot 4 Nuke Script
Here are the AOV's I was given for Shot 4:

AOV Layers of Perfume Bottle
As you can see, this week I had AOVs I could adjust (YIPPEE!!!), so I adjusted the different layers using color correction and grading to match the bottle to Shot 5's comp for continuity (hence the read node to the left of the script, so I could keep referencing Shot 5's colors).
I then created a subtle vignette around the image using the same method I implemented in Shot 5 (tutorial in Shot 5 below):

Roto for Vignette

Before Vignette

After Vignette
I adjusted the water droplet's reflection to be more noticeable by grading:

Before Water Droplet's Reflection grading

After Water Droplet's Reflection grading
I then added a subtle glow to only the Specular Indirect AOV Layer:

Before Glow

After adding Glow to Specular Indirect AOV Layer
Just like in Shot 5, I added a light wrap:

Before Light Wrap

After Light Wrap
After all these adjustments, I was pretty happy with the result this week, but will continue to adjust according to mentor and professor feedback... I may take out the light wrap depending on what they say.
Shot 5:
Here is the mp4 of just the exrs that were given:
Week 5 Raw EXR Renders
Here is the final comp:
***I was told that the perfume shader color was incorrect so I had to color correct last second:
Perfume Reference:
Week 5 Shot 5 Comp COLOR CORRECTED
Original Week 5 Shot 5 Comp
Here is my Nuke Script:

Week 5 Shot 5 Nuke Script
Here are the AOV layers I was given, viewed through a LayerContactSheet Node:

AOV Layers of Environment

AOV Layers of Perfume Bottle
I did several things for this comp. I keyframed the grading for the flowers so when the scene settled with the bottle against the sun, the flowers were brighter.
After adjusting the colors of the bottle (using the AOVs), I wanted to add ZDefocus to the flowers in the background, however the depth environment layer was not reading all the flowers correctly, and I did not receive a cryptomatte layer, so I keyframed and adjusted the flowers to how I wanted them blurred, then roto'd the foreground flowers so they would be crispy and in focus.

Foreground Flowers not being read correctly in depth

Depth Blur added to overall scene

Rotoing the Foreground Flowers

Comp with Blur and Roto'd Foreground Flowers
I was thinking that the water was looking dull / flat, so I used the live plate and flipped it, using an overlay merge to bring it into only the water:

Flipping Live Plate and Transforming

Before Plate

After Plate (After overlaying the flipped live plate to where the water was)
It was subtle, but it gave it what it was missing. Next I played around with adding glow to the bottle:

Comp with NO GLOW

Applying glow to Specular Direct AOV Layer

Glow Result
Though the result was nice and simple, I felt as if it could be pushed more with a light wrap:

With LightWrap
I also added a vignette to the overall image, which the group felt like it was a nice touch. I used a black Constant Image, and used a ellipse roto with lots of feathering to achieve this look:

Vignette using ellipse roto and black constant image

Vignette Result
Last thing I did was play around with faking light rays. This was new and fun to me.

Nodes used to create fake light rays
I first used a noise node to create the base of the rays:

Noise Pattern used
Then by using a DirBlurWrapper, I moved the center of the directional blur to the middle, blasting the rays outward. You can move it to other positions to create more directional rays, but in this case we needed it to blast outwards since the camera is facing the sun directly.

Moving center of DirBlurWrapper to the middle
Next I color corrected it to match the live plate, and added a glow:

Color Corrected and Glow added
Here is the before:

Comp with NO Light Rays
Here is the after:

Comp with Faked Light Rays
The group and I liked the rays, so we will keep it in this week's video, but we will see what the mentors say and adjust accordingly to their feedback! The group also wanted to try out having the Chanel CC Logo in between the perfume bottle and the live plate, so I tried a quick comp:

Quick Logo Comp
Though the idea was there, we had wanted to fade the background and product out to just a white background, but then the logo would have been off centered. We will continue to test out different end cards.
1/29/25: Fixing the HDR (Week 4)
This week we settled on one HDR, and I came up with some possible solutions to fix it up, since the sand was reflecting onto the product and it looked pixeled/bad. Here is the original HDR we have chosen to use:

Original HDR
Here are the several fixes I tried within photoshop. Left images are the fixed HDR options, Right Images are the color corrected version of those images.


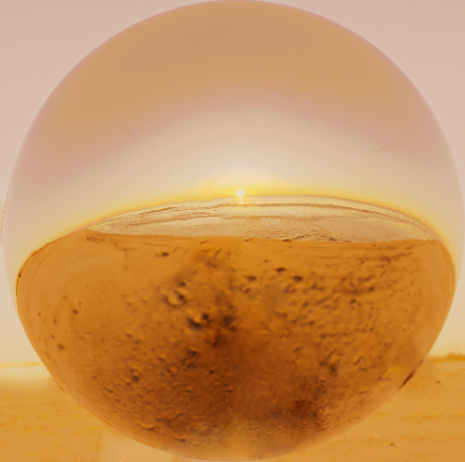


HDR Fixes and Color Correction
I was referencing this live plate to color correct, as this is the one I used for last week's shot 4 comp:

Color Reference for Matching
I will continue working on developing the color correcting, but for now I am waiting on the Look Dev Team to let me know which HDR works best in terms of reflections, or if none of them work. The last option was to get rid of the ground / ocean completely and just have sky, but I wanted to try other things before we did that, since it wouldn't look completely natural. Stay tuned to see if any of them work out!
1/26/25: More R&D and First Render! (End of Week 3)
Here is some of the feedback that I received from the mentors this past week/meeting that corresponded to my work:
-Plates were too saturated (aim for pastel colors)
-Add a tinge of pink to the plates to match the slightly pink Camellia flower
-Get rid of Perfume Spray (No more green screen shoot)
-Work on color correcting HDRs
-Match HDRs to Live Plates
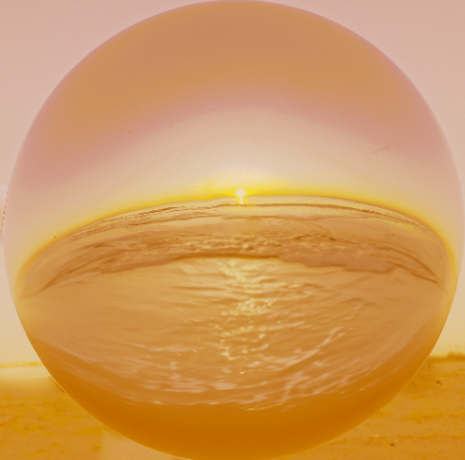
I began by color correcting the HDRs so that the Look Dev Team could apply it to their scenes ASAP. I tested the HDRs by pulling them into Maya and setting it up through the Skydome, and aligning it through a CG Chrome Ball. I then created a simple cube with beveled edges to imitate our product, the perfume bottle. I created a glass shader and applied it to the stand in bottle. I then did a quick render to see how the HDR reacted with the glass shader and shape of the bottle.
Here are the results of the color correction and render tests that I conducted:


HDR 1: Original Image (Left), Color Corrected Image (Right)


HDR 1: Render Tests


HDR 2: Original Image (Left), Color Corrected Image (Right)


HDR 2: Render Tests


HDR 3: Original Image (Left), Color Corrected Image (Right)


HDR 3: Render Tests
I know that these still need some work, here are some next steps that I have for them:
-Add the slight pink to each HDR
-Figure out how to deal with the beach/shore, as it appears in reflections
-Match the HDR better to the live plates.
Here are also the plates that I adjusted according to feedback:

HDRs adjusted to be more pastel
Jenson also made this cute little color bar on the left that goes with the palette.
Unfortunately this week, we did get some snow in Savannah so that slowed our process down. The only thing I could comp this week was Shot 4, courtesy of Eva
.
Here is the original render provided by Eva:
Original Render by Eva
Here is the comp that I did with one of the live plates that I color corrected:
Shot 4 Comp
I made a couple of adjustments. Here is my Nuke Script:

Shot 4 Nuke Script
I did not have AOVs to work with this week, so I made do with what I had. I brightened the bottle by adjusting the blackpoint and gain, and I slightly color corrected it to add a tinge of pink to match the plate.
For the plate, I did some more color correction so that the orange would match the bottle better, and then I tracked the movement of the perfume bottle. I created a match-move from the perfume bottle track and applied it to the plate so that the bottle was correctly traveling in the space. I did apply another transform to the plate so I could just zoom in to the top left corner of the live plate. I am hoping to make more adjustments after receiving feedback from mentors this week, and hoping to get AOV layers this week so I have more to work with! As well as more renders if weather permits...
I did also realize that all of our shots will be CG on Live since I am applying all renders to the live plate, so I am excited to do that! More work I can do since we are no longer including the perfume spray.... I will also continue to color match the HDRs to the live plates so that the renders/comps look more natural to the plate.
Here is our new previs that I put together, with new camera movements courtesy of Jenson:
New Previs
I also did make a sound pitch presentation, as we are pitching tomorrow to a sound class in hopes of finding a sound designer or SFX artist. Here is the sound reference I chose to show them:
Sound Reference
Hopefully we find our sound artist. Stay tuned for more updates after our sound pitch and meeting with the mentors!
1/18/25-1/19/25: Shoot + R&D (End of Week 2, Beginning of Week 3)
This Saturday (1/18/25) we shot our live plate, the sunrise, on Tybee Island. It was an early shoot, as we got to the beach at 6 am. The sunrise was gorgeous, and Jenson and I got plenty of HDR images, as well as footage for the live plate. I converted the footage after I got home. After converting, I began to color correct the plate so that it would match our color palette. Here are the color tests that I did, which is part of my R&D (Research and Development).

Original Plate 1
Color Corrected Plate 1 Options (Expandable / Clickable List)


Original Plate 2
Color Corrected Plate 2 Options (Expandable / Clickable List)


Original Plate 3
Color Corrected Plate 3 Options (Expandable / Clickable List)


Original Plate 4

I made several options so my team would have options. Right now, we are leaning towards Plate 1 Options 3 and 4, and Plate 2 Option 3. This is to match our video references:
Ombre Nomade Fragrance: An Ode to Oud | LOUIS VUITTON
Myriad Perfume: Les Extraits Collection | LOUIS VUITTON
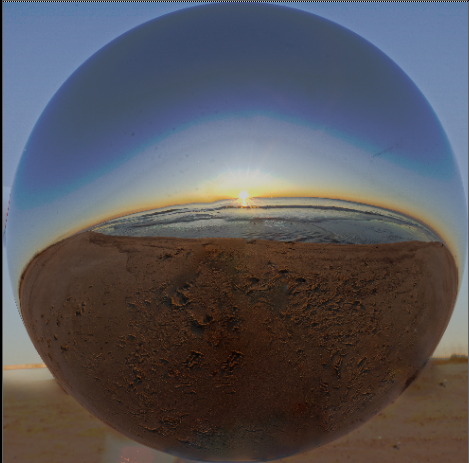
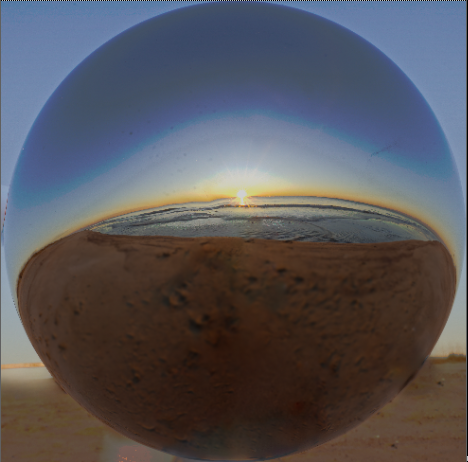
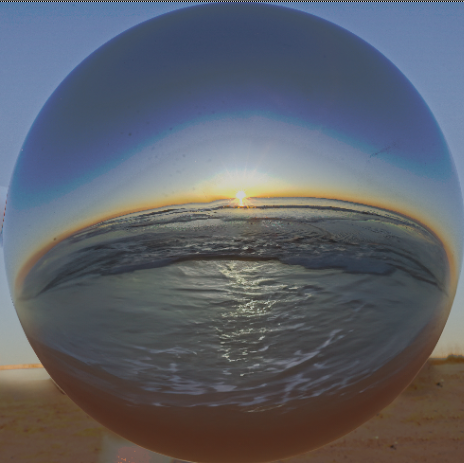
Here are all the HDRs I converted from the images we took, I put them all on a quilt so you can see all the options I created for my group to choose:

HDR Quilt
Besides the shoot, creating the HDRs, and testing the color correction on the plates, I also did some R&D on possibly doing a greenscreen shoot for a perfume spritz. I found some stock footage of perfume spritzes against a greenscreen from https://www.pexels.com/ . I keyed them out in Nuke, and I have to say I think it is doable!
Original Greenscreen Footage 1
Footage 1 After Green Keying in Nuke
Original Greenscreen Footage 2
Footage 2 After Green Keying in Nuke
The next step would be to schedule the green screen shoot then! This makes it easier on the FX crew so they have one less FX to create.
We also did change our shot list:
Shot 1: An establishing wide shot of the landscape, without product, that pushes in.
Shot 2: A medium shot focusing on the blooming flower.
Shot 3: Close up of water droplets as they fall, transitioning into Shot 4, which highlights the water drops on the perfume.
Shot 4A + 4B: Water droplet hitting perfume bottle. At the end of this shot (4B), the bottle spins slightly, transitioning into Shot 5, where the product spins 180 degrees while the camera follows.
Shot 5: The spinning movement transitions into Shot 6, which shows the perfume spraying.
Shot 6: Perfume Spritz
Shot 7: Wide shot of the landscape from the beginning. The camera continues to push out, returning to the wide shot from Shot 1 but now with the product in focus and in center. The Chanel Logo fades in at the top.
Shot 8: The Chanel Logo stays as the scene fades into white, leaving us with just a Logo End Card.
Here is the new storyboard by Shannon:

Storyboard Done by Shannon
Here is the previs I put together following that new storyboard:
New Previs
Tomorrow we will receive feedback on our HDR's and Live plates to determine which one to use. Stay tuned!
1/13/25: Pitch (Beginning of Week 2)
After a week of brainstorming and idea development, we have a more constructed pitch. I began with creating a storyboard for the ideas we put together:

Storyboard Sketched By Me Part 1

Storyboard Sketched By Me Part 2
Here is also the scanned pdf of the cleaner version after I redrew it:
Shannon digitized and colored the storyboard, and I typed in our shot notes:

Storyboard by Shannon
Before I go into inspirations and references, I want to show our Previsualization video. I put it together with specific details in each corner:
-Top Left Corner: Shot Number and if it is Full CG or CG on Live
-Top Right Corner: Timecode, and Initials of people who are working on this shot particularly
-Bottom Left Corner: Inset of 3D Previs done by the team
-Bottom Right Corner: Inset of any references that we are following
Previsualization Video
Here are our visual reference boards:

Mood and Lighting Reference by Jenson

Asset and Shader Reference by Shannon
Here are some reference videos we are following for the visual aspect:
Ombre Nomade Fragrance: An Ode to Oud | LOUIS VUITTON
Myriad Perfume: Les Extraits Collection | LOUIS VUITTON
We are paying a lot of attention to color scheme and the materials (shaders) we are choosing to match the essence of the product. While the rest of the team was developing the visual aspect of the project, I narrowed down our purpose and elements for the Pitch.
PURPOSE:
To accentuate the freshness and naturalistic floral notes of the perfume, while emphasizing a luxurious feeling with setting and color.
ELEMENTS:
Sunset: emphasizes calming and relaxation
Flowers/Flower Petals: symbolizes the floral notes of the perfume
Water: represents the naturalistic scent and base ingredient of the perfume
Perfume Mist: Shows how well the scent spreads and produces a luxury feeling.

Visual of Idea Slide
Jenson did also do some background research on the product and brand, and what stuck out to me the most was:
Aimed to develop an elevated, luxurious fragrance revolutionizing existing basic single-flower perfumes– becoming the first of its kind
Uses internationally sourced exotic scents that unite as powerful, rich and feminine
Minimalist design distinguishes No.5 as sleek, elegant, and timeless
I felt that our story aligned with the background of the brand, and that we could continue developing the visuals. That is when I began designing our slide deck to match the essence of our project brand. I think our presentations will now match our product a lot better! The original slides were blank with just the text and images, the slide images I included on this update were designed by me, going for an overall, unified look that matched the brand and product.
Team Pictures and Cover Slide, Design Example
I also created a general pipeline timeline for each week for the team to follow:
Wednesday - Thursday: FX works on first pass, look dev works on shaders
Friday: First passes from FX to Look dev. Look dev passes back file with lighting + shaders onto first pass file, FX makes sure that everything looks correct with look dev
Saturday : FX applies look dev's work to final render file, Render
Saturday evening -> Sunday Morning : Final renders to comp
Besides putting the pitch together, there wasn't much else I could do but prep the team. I went ahead and planned out our shoots and equipment list. We decided that we are going to shoot the sunrise at Tybee Island this weekend (1/17-1/19), and the reshoot is planned for the following weekend (1/24-1/26).
Here is our projected schedule, I began putting our general pipeline deadlines on there, as well as specific time goals we had in mind for specific parts of the project, as well as overall deadlines. Everyone else inputted specific deadlines for their own parts afterwards:

Projected Schedule
I will post an update after we shoot this weekend; I am hoping to get my hands on the HDR images ASAP to be able to start contributing more to the project VFX wise. Very excited for what's to come!
***If you are interested in the FX side of the Pitch and Project, take a look at Eva's and Wei's blogs! They go much more into detail about the FX. Rest of Crew's blog links are at the top of this blog!


Comments